Showing posts with label SAN. Show all posts

Monday, June 11, 2012

Failed write command to write-quiesced partition

ESX box may see below errors, due to some storage box side issues.
you may observe mostly on all the ESX hosts of the VC Cluster - kind of below errors.

ALERT: ScsiDeviceIO: 2352: Failed write command to write-quiesced partition naa.50a9800064656c5a4a5a654e35594123:1 
Extract from /var/log/vmkernel - below
/var/log/vmkernel cpu21:4342)NMP: nmp_CompleteCommandForPath: Command 0x2a (0x4102ff3ac040) to  NMP device "naa.50a9800064656c5a4a5a654e35594123" failed on physical path "vmhba1:C0:T1:L1" H:0x8 D:0x0 P:0x0 Possible sense data: 0x0 0x0 0x0.

/var/log/vmkernel cpu21:4342)WARNING: NMP: nmp_DeviceRequestFastDeviceProbe:
NMP device "naa.50a9800064656c5a4a5a654e35594123" state in doubt; requested fast path state update...

/var/log/vmkernel cpu21:4342)ScsiDeviceIO: 1672: Command 0x2a to
device "naa.50a9800064656c5a4a5a654e35594123" failed H:0x8 D:0x0 P:0x0 Possible sense data: 0x0 0x0 0x0.

Solution
There may be nothing much on ESX side to resolve these errors, Involve your storage vendor to solve this - refer at below VMware KB for more details.

http://kb.vmware.com/selfservice/microsites/search.do?language=en_US&cmd=displayKC&externalId=2009482

How to identify your DATA STORE name from NAA ID - Example below
# esxcfg-scsidevs -m | grep -i "naa.50a9800064656c5a4a5a654e35594123"

How to identify you LUN ID from Data Store Name
Select ESX at VC - configuration - storage - right click - Properties

Friday, April 23, 2010

Hitachi Data Systems has released a free eBook on Storage Virtualization..


Hitachi Data Systems has released a free eBook on Storage Virtualization..
Click on below link to download eBook..

http://www.hds.com/go/dummies/index.html?WT.ac=us_hp_sp1r1

Thursday, April 8, 2010

What is FAST? (Fully Automated Storage Tiering) at vBlock (by VMware, EMC, Cisco)

What is FAST? (Fully Automated Storage Tiering) at vBlock
Now available for 3 Flavors (Celera, CX4, Symmetrix)

FAST approach is the Brand new at EMC,
which will automatically move the the LUNs as below..

High I/O LUN’s to Flash Drives (SSD Hdd’s)
Modest I/O LUN’s to F.C Drives
Least I/O LUN’s to SATA Drives

Here are some features, highlights of FAST and how it operates.

• FAST will perform data movement based on IOPS, average I/O size and write percentage.
This is currently true for the Symmetrix V-Max, Clariion CX4 and Celerra NS.

• Three elements that define FAST: Storage Type, FAST policies and Storage Groups.

• FAST is based on user defined -- configuration policies.

• The configuration of FAST is typically done through FAST wizards FAST LUN Migrator for Clariion CX4,
(Symmetrix Management Console) on Symmetrix V-Max and Rainfinity File Management Appliance or VE for Celerra NS.


NOTE: Out of the box thinking by EMC, imagine the flexibility one would have
with a large infrastructure and FAST moving data based on policy.
It’s all about the big picture.


FAST – EMC Hands on Demo


Source : www.storagenerve.com (Full Article Link below)

http://storagenerve.com/tag/vblock/

Sunday, March 28, 2010

Discover iSCSI SAN LUN on ESX via CLI - As easy as you count 1,2,3 (assumes SAN admin mapped LUN to ESX Host & VMkernel port ready on ESX)


The command vmkiscsi-tool. Really good stuff, I can complete the rest of my setup without the GUI. One thing though to list out the iqn for iscsi after you enable it you must know the device name (ie vmhba??). Using this command:

# vmkiscsi-tool -I -l

I usually guess the iscsi hba is vmhba33 or 32 but how do I know for sure? Try:
# esxcfg-scsidevs -a
esxcfg-scsidevs-a
Ok great, now we know it is vmhba33 (Click the above image for full details as well)

[root@esxhost01 sbin]# vmkiscsi-tool -I -l vmhba33


iSCSI Node Name: iqn.1998-01.com.vmware:esxhost01-35151883
 

[root@esxhost01 sbin]#

Now with a few more vmkiscsi-tool commands I can finish configuring my iSCSI.

Add the Ip of the SAN:
[root@esxhost01 sbin]# vmkiscsi-tool -D -a 172.16.23.251 vmhba33

Now rescan:
[root@esxhost01 sbin]# esxcfg-rescan -a vmhba33

Saturday, March 27, 2010

While changing Preferred Path on Storage Adapter --> Unable to cast object of type ‘LogicalUnitPolicy’ to type ‘FixedLogicalUnitPolicy’

 
Source - http://www.simonlong.co.uk/
When trying to change the Preferred Path on Storage Adapter I was greeted with the following Error message
Unable to cast object of type ‘LogicalUnitPolicy’ to type ‘FixedLogicalUnitPolicy’
I checked my other Storage Adapters and these too gave me the same error.
The Fix
To fix this problem all you need to do is Rescan the Storage Adaptors using the following steps
  1. In the vSphere Client, select the Host which has the Storage Adaptors that are giving you the error and click the Configuration tab.
  2. In the Hardware panel, select Storage Adapters
  3. Select one of your Storage Adaptors and click Rescan above the Storage Adapters panel.
  4. Perform Step 3 for the rest of your Storage Adapters.

APD (All Paths Dead) --> important vSphere 4 storage bug is solved in patch ESX400-200912401-BG

Article Source from xtravirt.com

Chad Sakac over at http://virtualgeek.typepad.com already blogged about the APD bug in December last year. You can find his post here.

Just a short quote from Chad his post about the symptoms of this APD bug:
Recently saw a little uptick (still a small number) in customers running into a specific issue – and I wanted to share the symptom and resolution.   Common behavior:
  • They want to remove a LUN from a vSphere 4 cluster
  • They move or Storage vMotion the VMs off the datastore who is being removed (otherwise, the VMs would hard crash if you just yank out the datastore)
  • After removing the LUN, VMs on OTHER datastores would become unavailable (not crashing, but becoming periodically unavailable on the network)
  • the ESX logs would show a series of errors starting with “NMP”
Examples of the error messages include:
    “NMP: nmp_DeviceAttemptFailover: Retry world failover device "naa._______________" – failed to issue command due to Not found (APD)” “NMP: nmp_DeviceUpdatePathStates: Activated path "NULL" for NMP device "naa.__________________".
What a weird one…   I also found that this was affecting multiple storage vendors (suggesting an ESX-side issue).  You can see the VMTN thread on this here.
We found out about this issue during a big storage project. We where creating a lot of new LUNs and where removing a lot of the old LUNs. If you remove a LUN on a way not mentioned in Chad his post:
This workaround falls under “operational excellence”.   The sequence of operations here is important – the issue only occurs if the LUN is removed while the datastore and disk device are expected by the ESX host.   The correct sequence for removing a LUN backing a datastore.
  • In the vSphere client, vacate the VMs from the datastore being removed (migrate or Storage vMotion)
  • In the vSphere client, remove the Datastore
  • In the vSphere client, remove the storage device
  • Only then, in your array management tool remove the LUN from the host.
  • In the vSphere client, rescan the bus.
So when we used the workaround described above, everything went fine. But at my current employer, we use a large LeftHand iSCSI SAN.  One of the great things of Lefthand SAN is the ability to move LUNs between different clusters. With the APD bug, we couldn’t use this option anymore.
When we discovered this APD bug we contacted VMware Support. After a couple of weeks we received an e-mail with the following fix.
I can now confirm that the APD (All paths dead) issue has been resolved by a patch released as part of P03.
To install this patch, please upgrade your hosts to vSphere Update 1 and use Update Manager to install the latest patches.
Please ensure that ESX400-200912401-BG is installed as this resolves the APD problem
We upgraded one of our clusters to Update 1 and installed the latest patches including the ESX400-200912401-BG patch. After installing the patch, we did some tests and I can confirm that the APD bug is history!!

For Step-by-Step Upgrade Sequence Guide on how to update APD patch? - Click This Link

More info about the patch can be found here:
For the readers who cannot upgrade to vSphere Update 1 and the latest patches, you can find some workarounds here on below:

Wednesday, March 24, 2010

Configuring and troubleshooting basic software iSCSI setup

Configuring and troubleshooting basic software iSCSI setup (Extract from Vmware KB 1008083)

Symptoms


You are experiencing these issues with iSCSI targets:
  • Targets are numbered out of sequence.
  • Targets do not appear in VMware Infrastructure (VI) Client or VirtualCenter.
  • Targets do not appear in vSphere Client or vCenter Server.

Purpose


This article provides basic software iSCSI setup, configuration and troubleshooting.

Resolution


Configuration

From vSphere Client/VMware Infrastructure (VI) Client or vCenter Server:

  1. Ensure you have a separate physical vswitch for iSCSI.

  2. Add a VMKernel and Service Console portgroup and give them appropriate IPs.

    Note: A service console may not be needed if working in ESX / ESXi 4.0.

  3. Log into the ESX host and ensure you can ping the iSCSI array. Run the following command:

    # ping 10.1.10.100

    PING 10.1.10.100 (10.1.10.100) 56(84) bytes of data.
    64 bytes from 10.1.10.100: icmp_seq=0 ttl=64 time=0.766 ms


    Note: You do not need to use ping when working with ESX / ESXi 4.0 hosts.

  4. Log into the ESX host and ensure you can vmkping the iSCSI array. Run the following command:

    # vmkping 10.1.10.100

    PING 10.1.10.100 (10.1.10.100): 56 data bytes
    64 bytes from 10.1.10.100: icmp_seq=0 ttl=64 time=0.940 ms


    If you are unable to ping or vmkping the array, you need to correct your network connectivity issue before iSCSI works.


  5. Log in to vCenter Server, click on the ESX host, and click Configuration.

  6. Click Storage Adapters and click on the iSCSI Software Adapter.

  7. In the Details pane, click Properties.

  8. On the General tab, click Configure, select Enabled, then click OK. You notice that the Status is now enabled, and the iSCSI name has a valid IQN.

  9. Configure the iSCSI array to use the IQN you have just created. Generally, you also need to assign storage to the ESX host from the array.

  10. Click the Dynamic Discovery tab and click Add.

  11. In the Add Send Targets Server area, add the iSCSI array IP to the iSCSI Server field and click OK.

  12. After the iSCSI Server is added, click Close. This may take a significant amount of time.

  13. Rescan the ESX host storage in the Storage Adapters section, after the rescan, click on the iSCSI initiator and you see information about the SAN array as well as one or more targets.

Troubleshooting

To troubleshoot your setup or re-number your targets:

  1. Ensure that the array, and possibly each Service Processor, has an entry in each of the following files:


    • /etc/vmkiscsi.conf

      Syntax: DiscoveryAddress=:

      For example, DiscoveryAddress=10.200.107.10:3260


    • /var/lib/iscsi/vmkbindings

      Syntax: 0 0

      For example, 0 0 iqn.1992-08.com.company:sn.84259608

      Note: This file is rebuilt on rescan and should be recreated if iSCSI target numbers are out sequence.

    • /var/lib/iscsi/vmkdiscovery

      Syntax: 0 0

      For example, 0 0 iqn.1992-08.com.company:sn.84259608

      Note: This should be recreated if iSCSI target numbers are out sequence.


  2. Restart the Software iSCSI initiator:


    1. Disable the software iSCSI interface

      # esxcfg-swiscsi -d


    2. Kill the iSCSI stack

      # esxcfg-swiscsi -k


    3. Re-enable the iSCSI interface and open the firewall

      # esxcfg-swiscsi -e


    4. Rescan the Software Initiator, wait about 30 seconds after re-enabling

      # esxcfg-swiscsi -s


  3. Rescan a second time.

  4. Reboot the ESX host to have the changes take effect.
Note: If the vswitch is using NIC teaming, as a troubleshooting step, try disabling the second NIC and see if iSCSI functions.

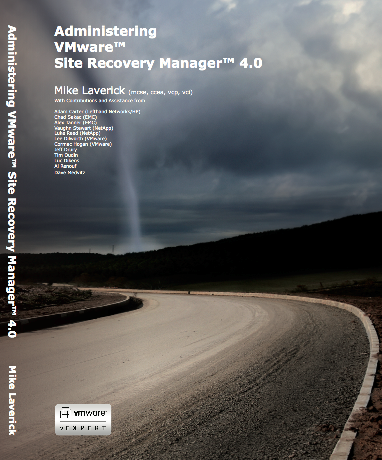
Administering VMware Site Recovery Manager 4.0 (Step by Step Guide)

Mike Laverick has released his newest book “Administering VMware Site Recovery Manager 4.0” and you don’t have to pay for it, well it would be a great if you donate at least 10$ to Unisef.
This book will teach you how to install and configure VMware’s Site Recovery Manager product. It also covers in detail the failover and failback processes and Mike will guide you step-by-step through the setup of the product. This book in not filled with project management padding that typifies a lot of IT books. It’s practical and technical, and assumes you are already pretty familiar with VMware vSphere4. In This book you will learn the strengths and weaknesses of Site recovery Manager, and Mike will show you the common pitfalls and errors that can happen, and also more importantly why they happen, and how to fix them.
Click Here to Download Whole Book - SRM 4.0